WhatsApp Not Sending Messages: 3 Efficient Methods
Apr 19, 2022 • Filed to: Manage Social Apps • Proven solutions
Since WhatsApp was founded back in 2009, it has been used globally for communication. As of today, over 1 billion users are using WhatsApp to chat on a daily basis. However, glitches are everywhere and as a result, many times WhatsApp does not work properly. Most Smartphone users both iOS and Android customers, at some point might have come across the issues of WhatsApp message not getting sent. Usually, an unstable internet connection, insufficient storage, incomplete verification during installation, or being blocked by a certain contact might be the reason for such problem.
Now that we have been through the reasons you don’t need to bother ‘why your WhatsApp message is not being sent?’ In this article, we will introduce the troubleshooting tips to fix WhatsApp message not sending error in iOS and Android devices. Let us begin.
Part 1: Troubleshooting WhatsApp not sending messages on iPhone
Want to send a WhatsApp to your friend on iPhone but encounter with “WhatsApp not sending messages” problem? Here we have illustrated some methods to fix this problem.
1. Check the network connection
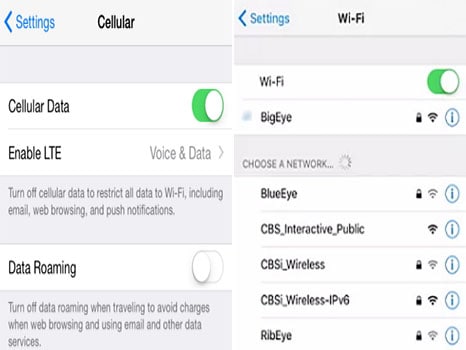
Assure that you are connected to an active cellular or Wi-Fi connection. You can check your network connectivity by navigating to your phone’s “Settings” and turn on “Cellular Data”. In case of Wi-Fi Connection, turn on Wi-Fi and provide the correct password to connect. If this doesn’t work, simply try to turn off the internet connection (whether Wi-Fi or cellular data) and then wait for 10 seconds. Turn it on and see if it works.
2. Restart iPhone
Once you have ensured your network connectivity, if still your message sending problem has not been resolved try restarting your iPhone. This could be a great solution and the easiest one as when you reboot your device, it simply fixes minor glitches easily.
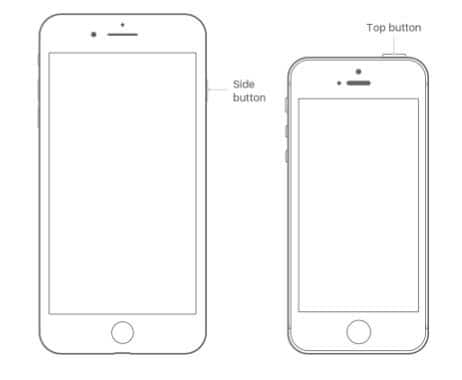
For iPhone 8 and earlier, long press the side button or top button, until the slider appears. Drag the slider to turn off the iPhone.
For iPhone X, long press both “side” and the “volume” button; keep holding till the slider appears.
3. Free some space from iPhone storage
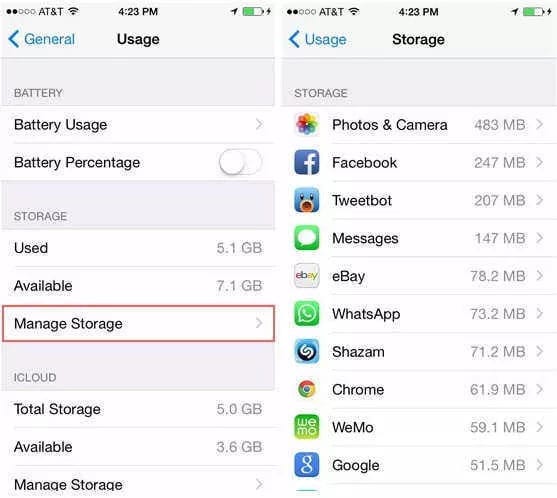
Delete unwanted files and applications from your iPhone. To do this, navigate to “Settings”, and then select the “General” tab. Under the general tab, click the “Usage/iPhone storage” tab and go to “Manage Storage”. Delete all the unnecessary files.
4. Reinstall WhatsApp
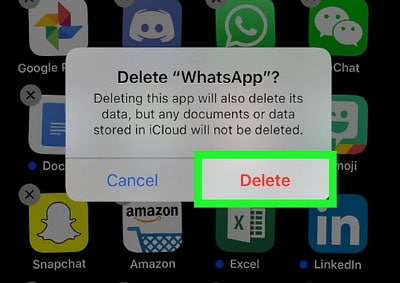
If nothing above works, easiest way is to reinstall the WhatsApp on your iPhone. Before reinstalling make sure you have a backup. To reinstall it, tap and hold the WhatsApp icon till it wiggles. After that tap on “Delete” to confirm.
To install, Go to the “App Store” and look for the app. Install it and set up WhatsApp.
5. Reset iPhone
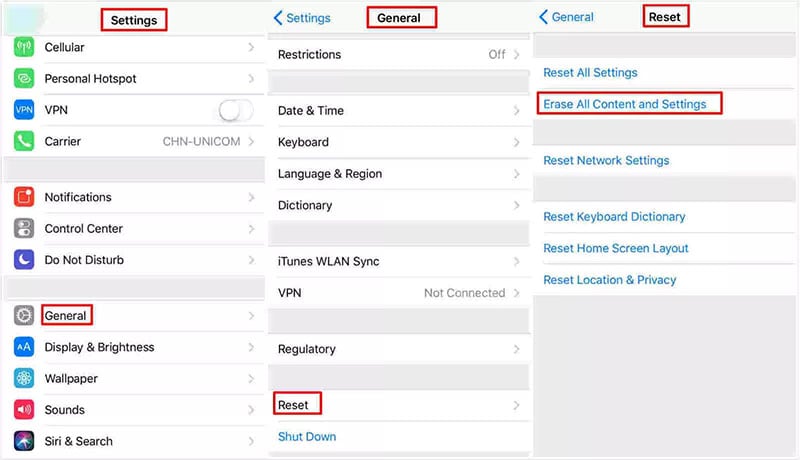
Still if WhatsApp message not sending issue persist, last option is to reset your iPhone. Special mention, the data will be wiped off after you perform this method. So, try this only if you have backup or you’re comfortable doing it. For doing this, navigate to “Settings” and browse the “General” option. Tap on “Reset” and finally select “Erase all contents and settings”.
Part 2: Troubleshooting WhatsApp not sending messages on Android
Like iPhone users, Android users also reported “WhatsApp message not sending” error. Learn how to resolve this, following the steps detailed below.
1. Check the connection
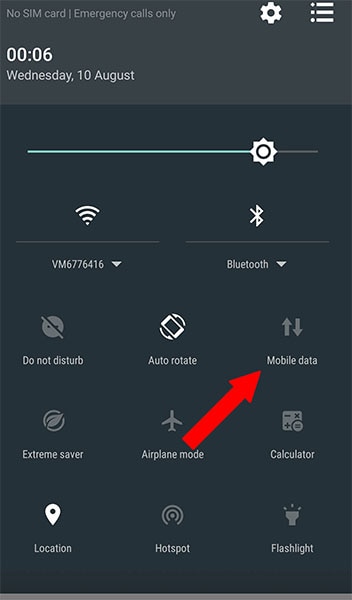
Similar to iPhones, you first need to make sure to check internet. Ensure that your device is connected to either “Wi-Fi” or the “Mobile Data” is active. Sometimes, due to an unstable connection, messages won’t get delivered. Also, as you did above, try disabling and enabling the internet connection.
2. Clear the Cache
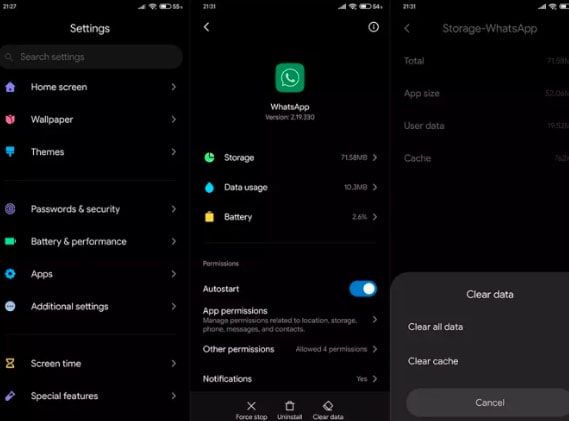
After that, we recommend you to free the WhatsApp cached data from your handset memory. To do so, open “Settings”, choose “Apps” and open “Manage Apps”. Locate and open WhatsApp, tap “Storage” tab, finally clear data; and reboot your device.
3. Reboot your Android Phone
Reboot your phone if the issue doesn’t resolve. Turn it off, wait for about 30 seconds, and then turn on the phone.
4. Reinstall WhatsApp
To do this first backup your WhatsApp locally, then uninstall the app. For uninstalling, long press the “WhatsApp icon”, uninstall option appears, select it. To install, go to Play Store, search for WhatsApp and install. Verify correctly to ensure proper communication.
Part 3: Efficient solution to backup & restore WhatsApp: Dr.Fone - WhatsApp Transfer
If backup and restore WhatsApp is your concern, Dr.Fone - WhatsApp Transfer can be a solution to it. A smart backup and restore tool for your android and IOS device to save space, indeed! Using this, anyone can extract and transfer WhatsApp fast and safe with a simple interface. Not just WhatsApp, you can use Dr.Fone - WhatsApp Transfer in data transfer, backup and restore your Wehcat, Viber, Kik, Line chat including attachments easily and flexibly.
The best part about the tool is it can help preview your backup and you can restore it anytime. Let us know how you can fulfill backup and restore with this.
Tutorial: How Dr.Fone - WhatsApp Transfer works
The steps to backup and restore data for both iPhone and Android devices are same.
Backup WhatsApp message on iPhone and Android in one-click
Step 1: Download the tool and launch
Firstly download and install the Dr.Fone - WhatsApp Transfer tool on your PC. Run it and click on “WhatsApp Transfer” tab you can see on the main interface.

Step 2: Choose Option
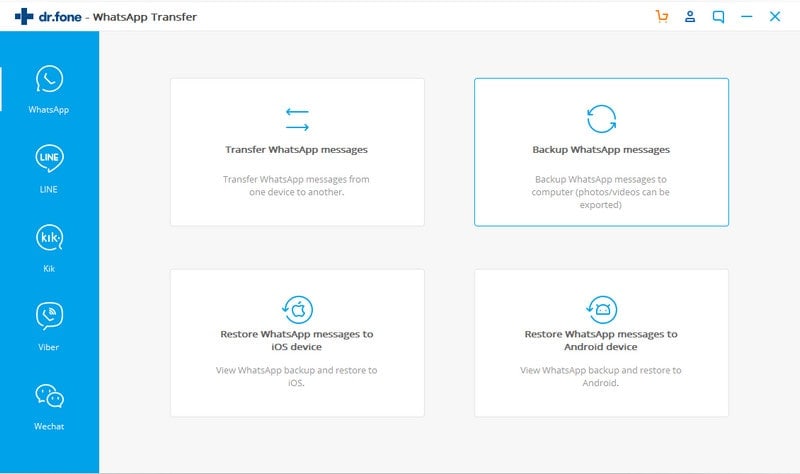
Now, from the left panel, choose “WhatsApp” tab and go for “Backup WhatsApp messages”.
Step 3: Connect device to your PC
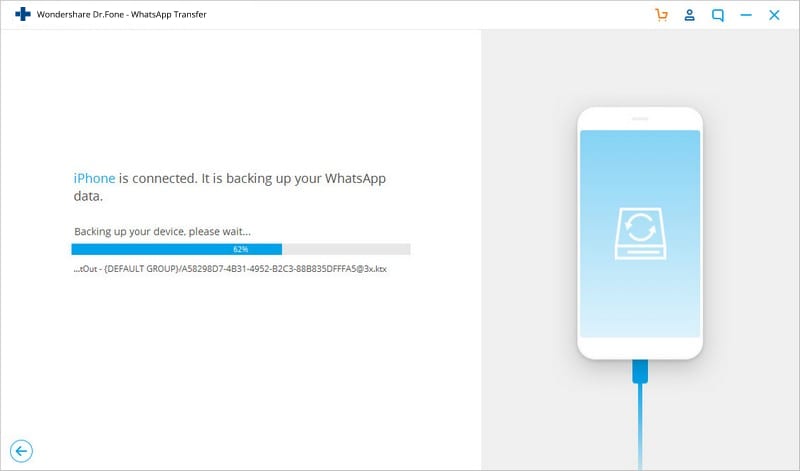
Plug in your device with a USB/lightening cable to your PC. Dr.Fone will automatically scan and detect your connected iOS/Android device. Once detected, it will start making backup on its own.
Step 4. View Backup Files
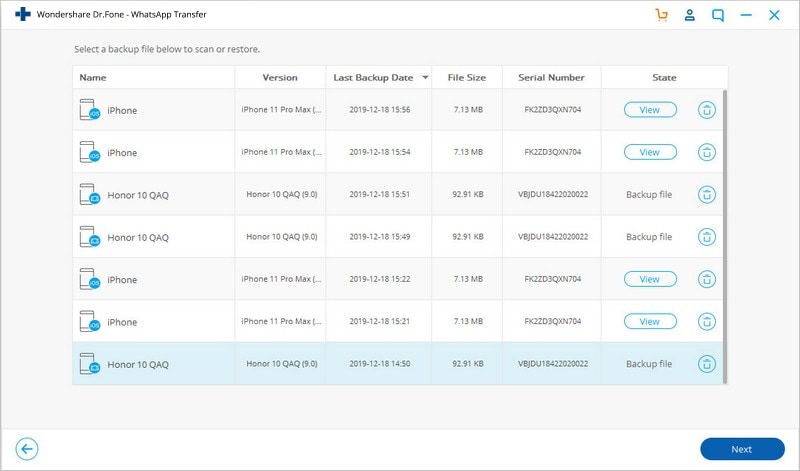
You will be notified once backup is successfully completed. Click on “View it” button next to the file to check it.
Restore WhatsApp backup to your smart device in one-click
Follow these steps to restore all your confidential WhatsApp data.
Step 1: Choose the correct option
Start as you did above, i.e. launch the program and choose “WhatsApp Transfer” from the main interface. Choose “WhatsApp” from the left panel and select the "Restore WhatsApp messages to iOS device" tab.
Step 2: Device Connection
Now that you have chosen the required tab, simply use the cord (lightening for iOS and USB for Android) to connect your device to the PC. You will notice all the backup files listed on the screen.

Step 3: Restore WhatsApp message
Choose the desired backup file and then click “Next” to proceed for direct restoring to the device.
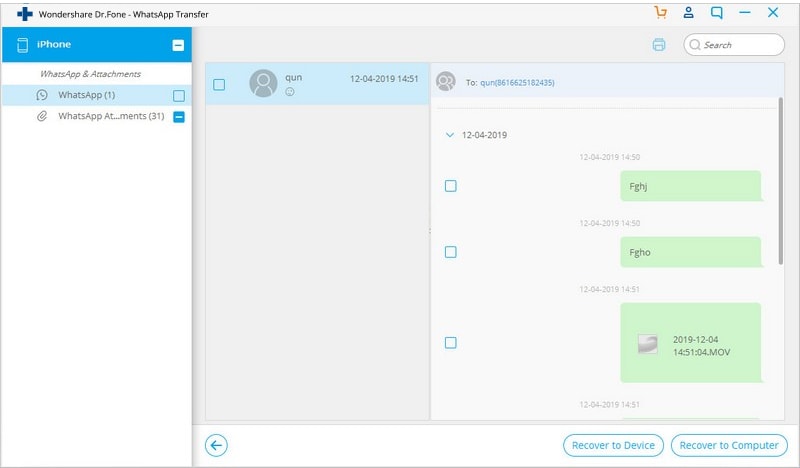
You can also pick out and open the backup files. Choose the ones you need and restore selectively. Click on “Recover to Device” and you are good to go.
WhatsApp Tips & Tricks
- 1. About WhatsApp
- WhatsApp Alternative
- WhatsApp Settings
- Change Phone Number
- WhatsApp Display Picture
- Read WhatsApp Group Message
- WhatsApp Ringtone
- WhatsApp Last Seen
- WhatsApp Ticks
- Best WhatsApp Messages
- WhatsApp Status
- WhatsApp Widget
- 2. WhatsApp Management
- WhatsApp for PC
- WhatsApp Wallpaper
- WhatsApp Emoticons
- WhatsApp Problems
- WhatsApp Spam
- WhatsApp Group
- WhatsApp Not Working
- Manage WhatsApp Contacts
- Share WhatsApp Location
- 3. WhatsApp Spy


James Davis
staff Editor
0 Comment(s)